Quick start
This guide takes you from a fresh install to media served from the cloud.
-
Choose your provider.
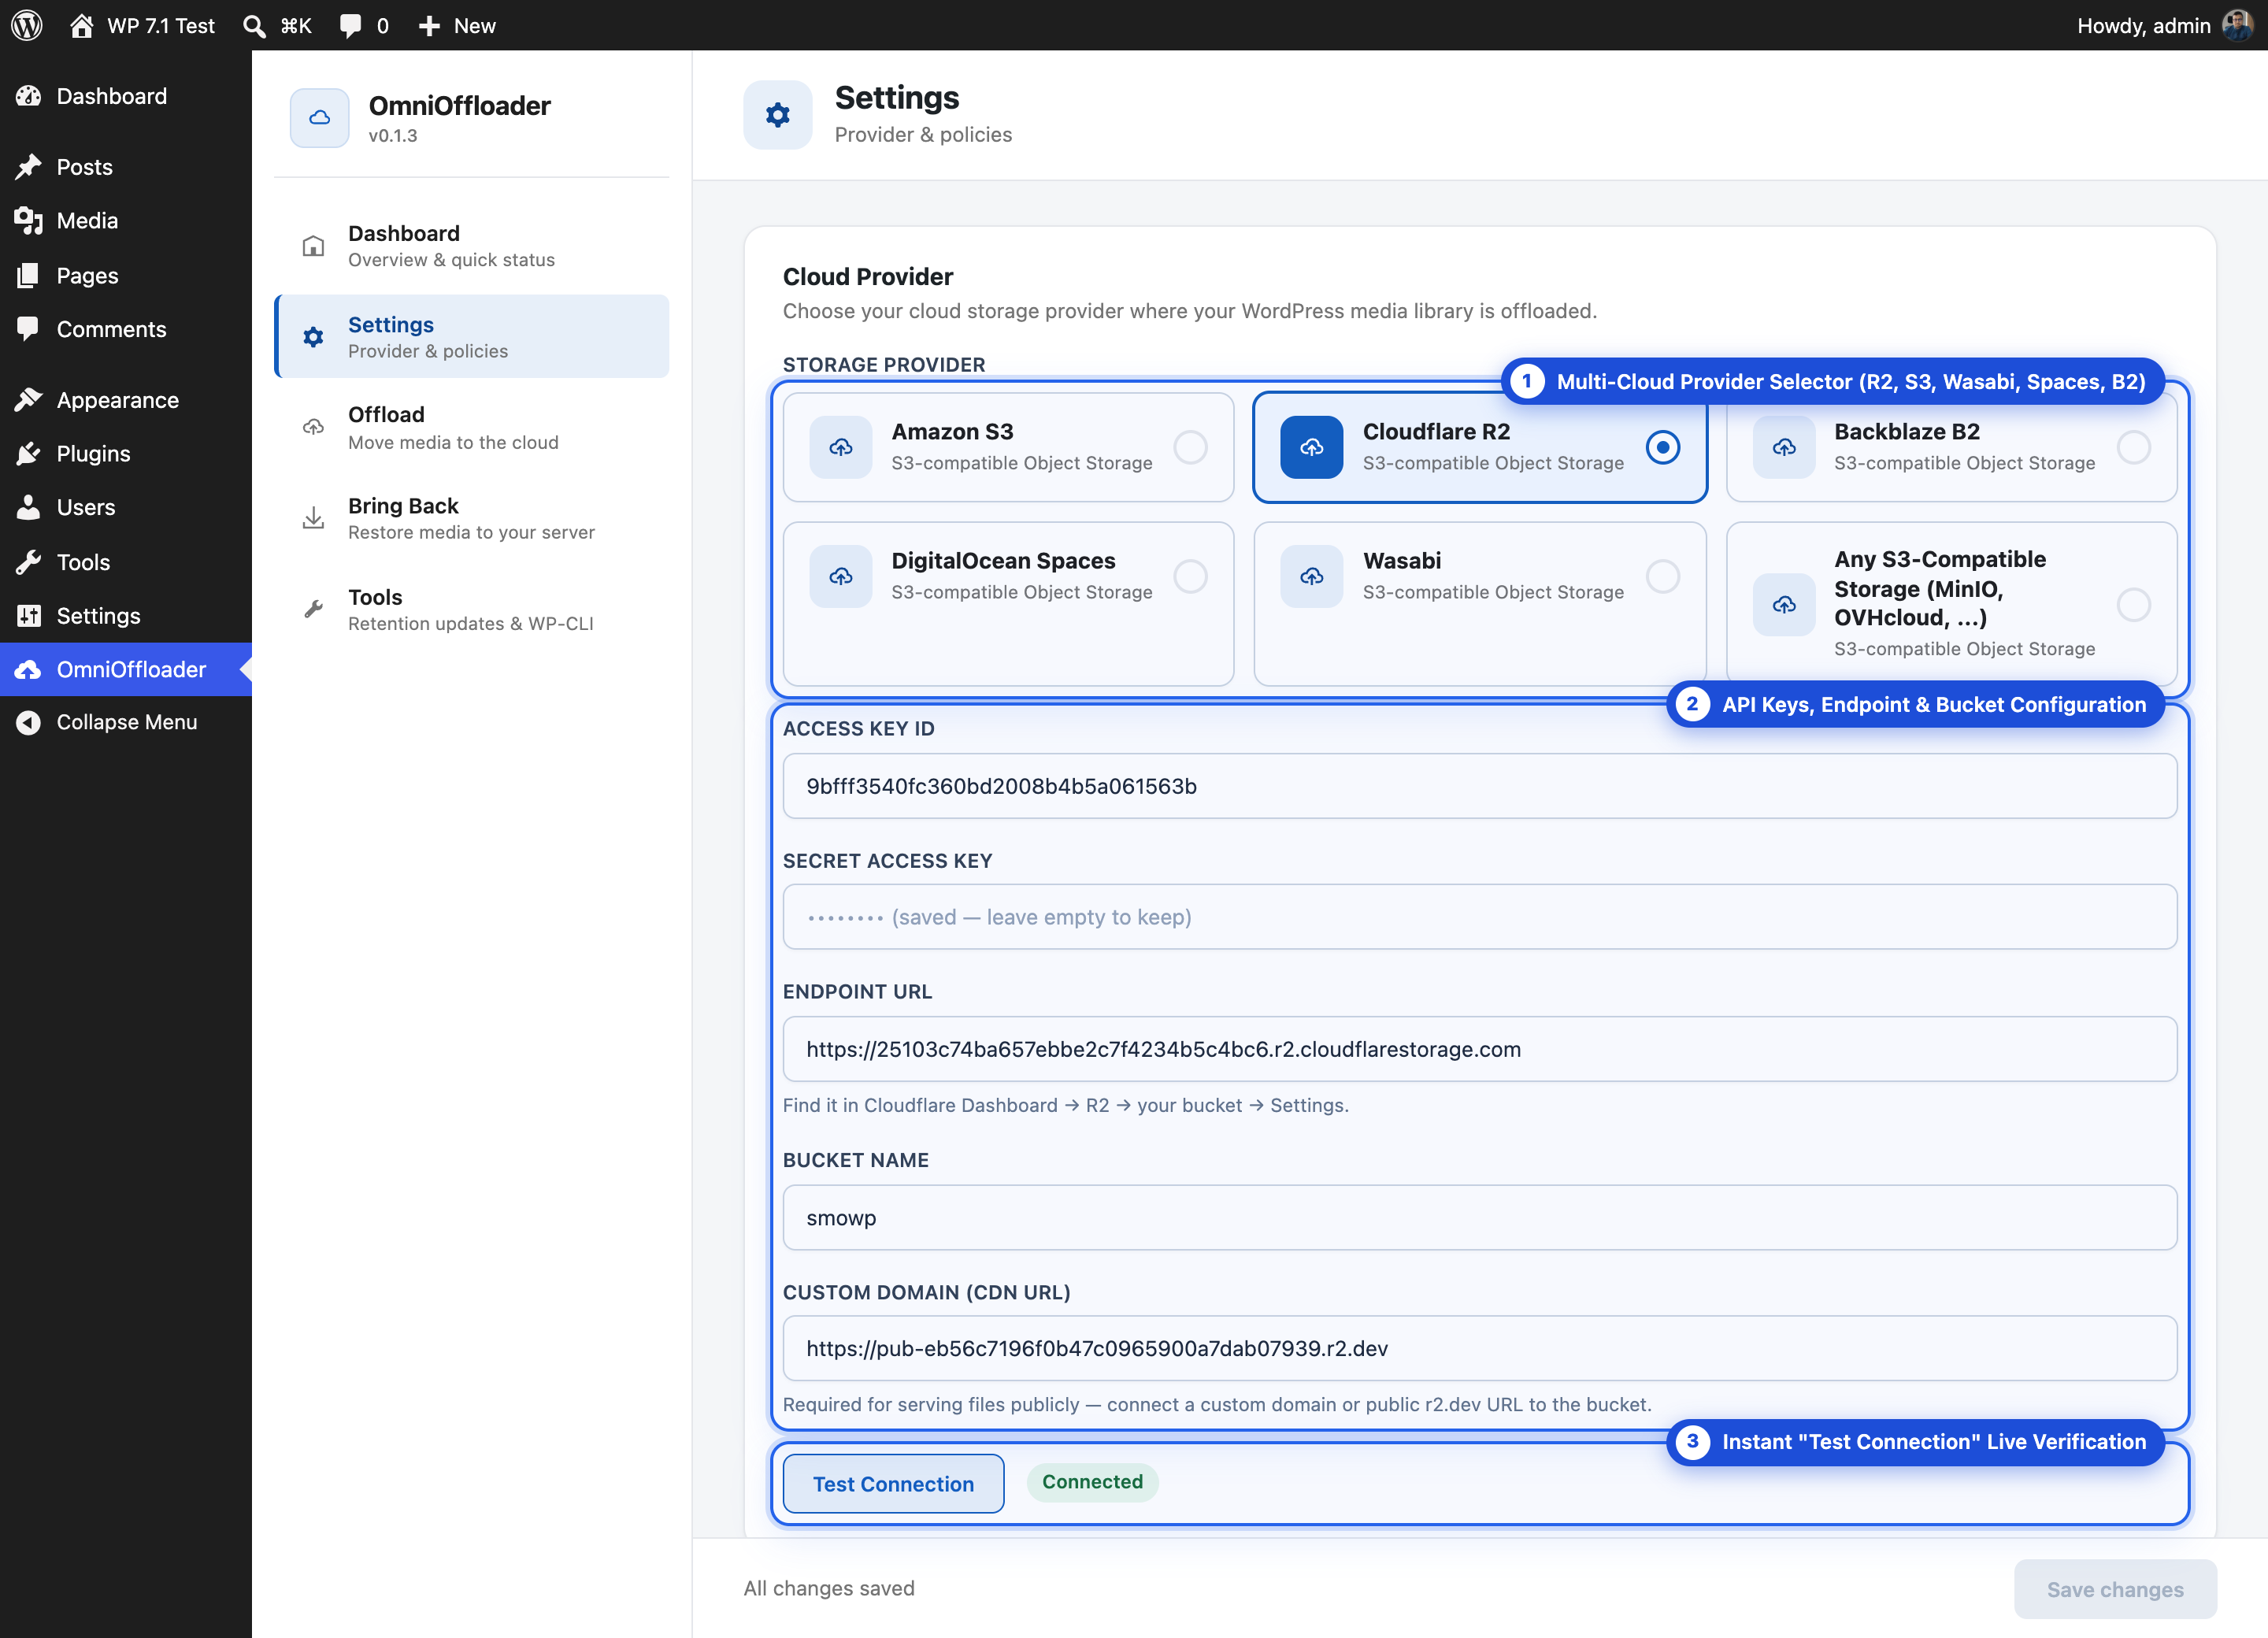
Open OmniOffloader → Settings. Under Cloud Provider, pick your storage provider.
-
Enter your credentials.
Fill in the access key, secret, bucket name and the other fields your provider needs.
Enter your Custom Domain / CDN URL too. This is the public address your media will load from, for example
https://media.yourdomain.com. Some providers, such as Cloudflare R2, have no public URL until you connect one. -
Test the connection.
Click Test Connection. You should see Connected. If not, see Troubleshooting.
-
Choose a retention policy.
Start with Retain Local Files. It keeps every file on your server while you check that everything loads correctly from the cloud. You can switch to a cleanup policy later and apply it to existing media.
-
Choose a Transfer Speed.
Balanced is right for most sites. Pick Low on a small shared hosting plan. See Transfer Speed.
-
Save your settings.
Click Save changes in the bar at the bottom of the screen.
-
Offload your existing media.
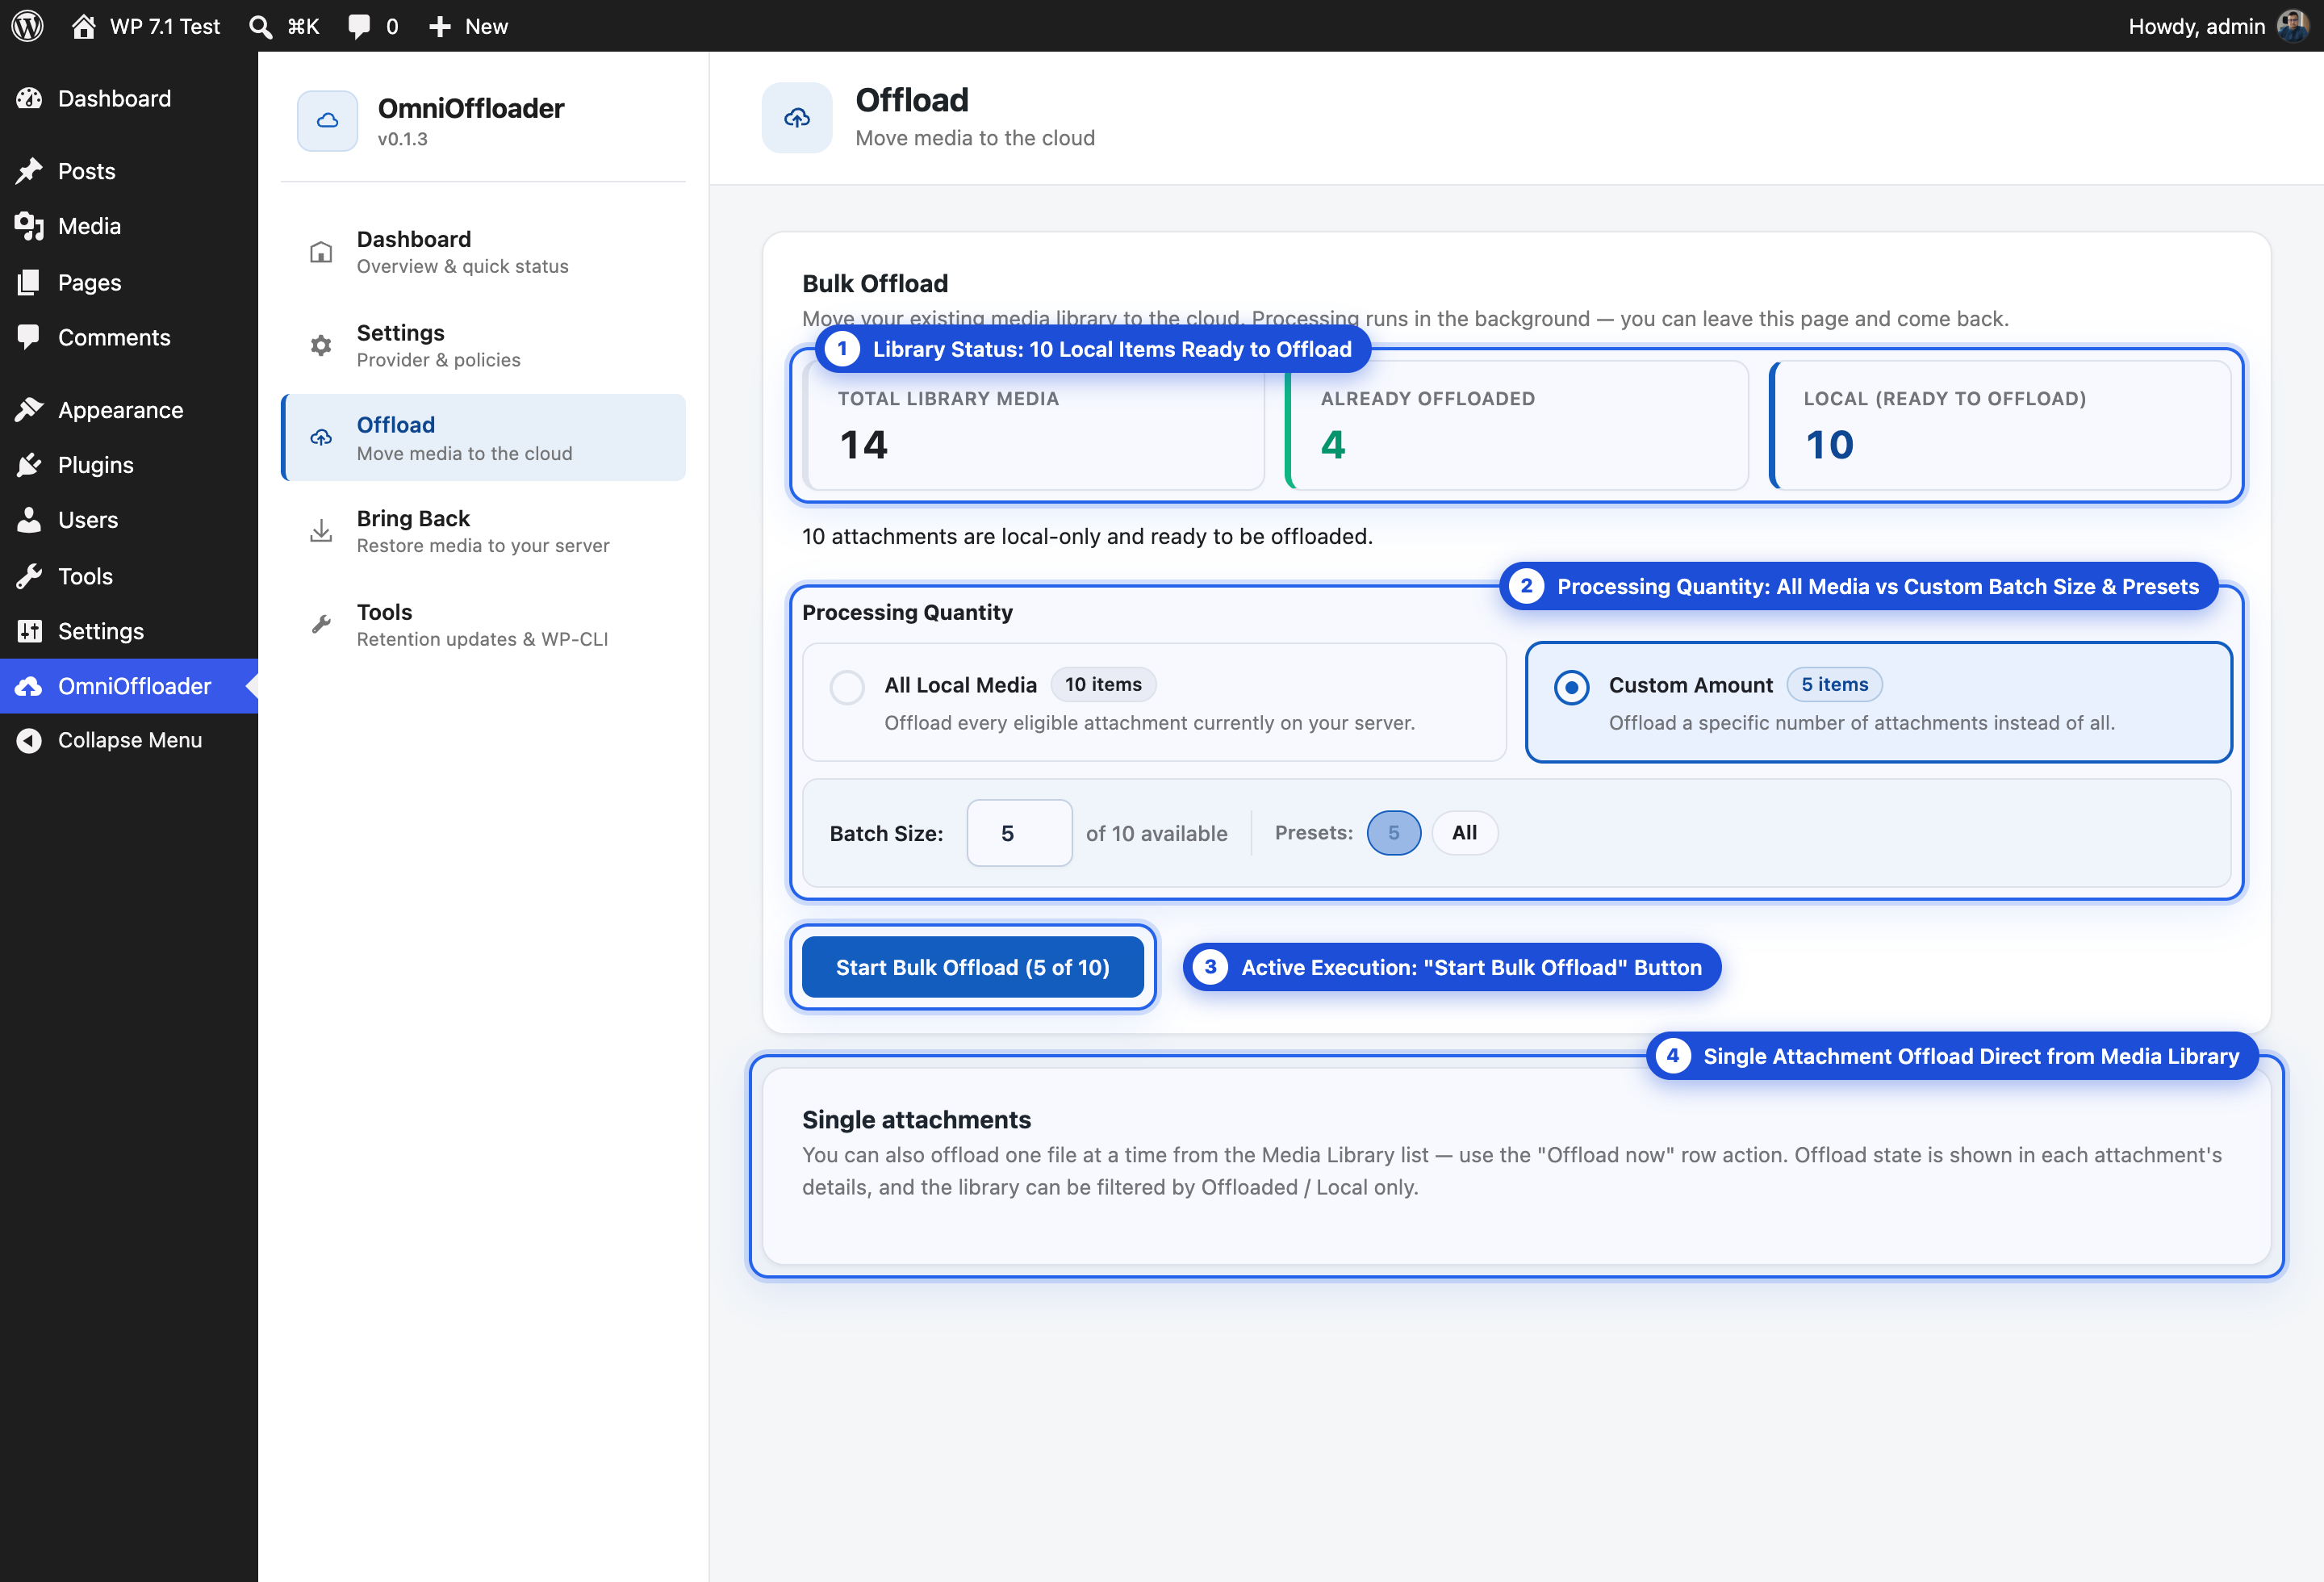
Open OmniOffloader → Offload and click Start Bulk Offload. The job runs in the background, so you can leave the page. From now on, new uploads are offloaded automatically.
-
Check your site.
Open a page with images and check an image address. It should now start with your CDN or custom domain.